3 Easy Ways to Back Up Windows 10 PC
The Top 3 Methods to Back Up Windows 10 PC
If you use a Windows PC for work, you have likely stored your important work documents on your computer. With these documents and data stored on your PC, it’s important that you keep your data safe and secure. Data loss can happen anytime and so it’s highly advised that you make a full backup of your Windows 10 system. It will help you when things go haywire as you can restore your computer using one of the backups and it will start to work normally as it did before.
Let’s see how you can create a Windows 10 system backup.
Section 1. Create a System Image Backup of Windows 10 (Make a Full Backup of Windows 10)
In this section, you’ll learn how to create system image Windows 10. With this full backup of your Windows 10, you will always have your most important data saved as a backup with you. It’s quite easy to make such a backup and the following steps should help you learn how to do it:
- Launch the Control Panel on your Windows 10 PC and head to System and Security and click on Backup and Restore (Windows 7).
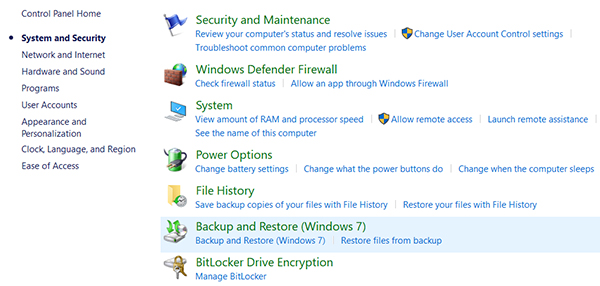
- Click on the Create a system image link in the left sidebar menu.

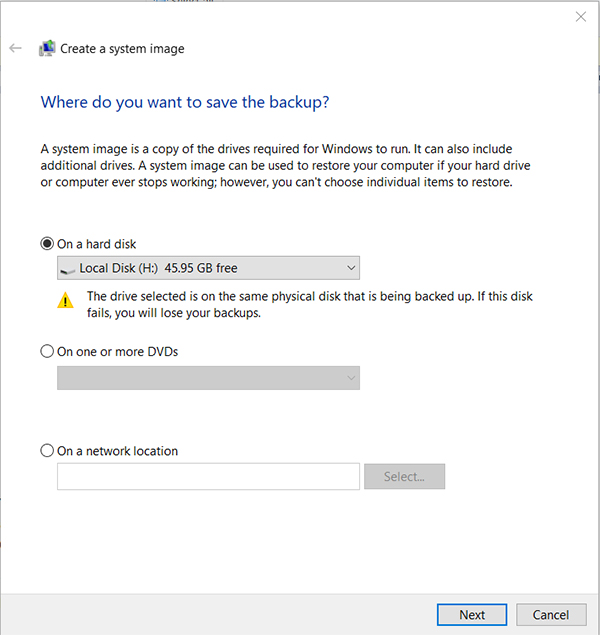
- You will be asked where you would like to save the backup. Choose On a hard disk from the options list and select a hard disk drive. Hit the Next button to continue.
- Click on the Start backup button on the following screen to start backing up your Windows 10 machine.
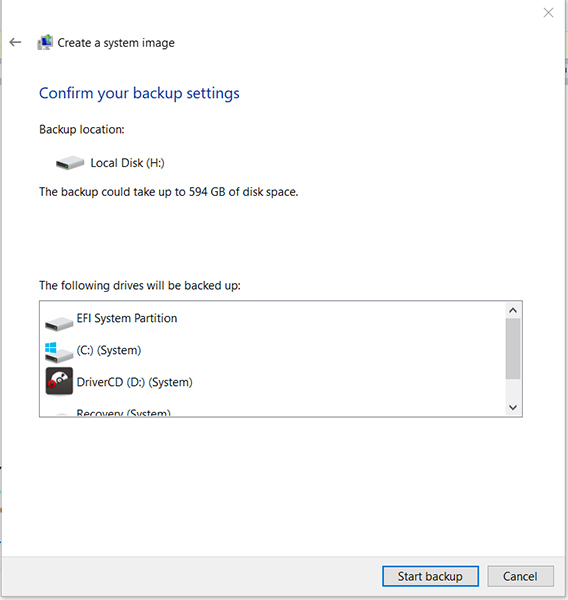
You will be asked to create a repair disc which is an optional step if you want to do. The backup wizard should have created a full backup including all the files you have stored on your PC.
If anything ever goes wrong in future, you can use the above created full backup to restore all the files on your Windows 10 PC.
Section 2. Back up Windows 10 Files Using File History
If you are concerned about the safety of the files on your PC, you should consider using the File History feature to create a backup of your important files on your PC. With the steps given below, you should be able to create a File History backup effortlessly.
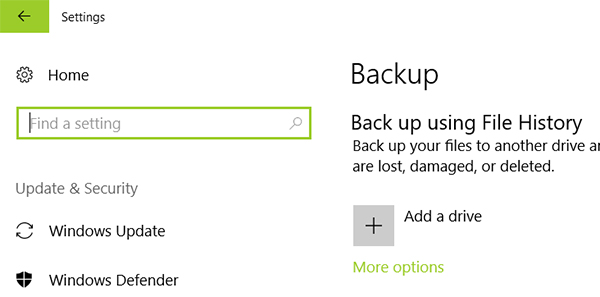
- Open the Start Menu on your PC and head to Settings > Update & Security > Backup. On the screen that follows, find and click on the option that says More options as the option you are looking for is not available here.
- Click on the Add a folder option to add a folder to be backed up on your PC and find and select a folder and click on the Choose this folder button.

The folder should be added to the list and it will be backed up as per the File History feature’s configuration settings. You can change the frequency of backups using the dropdown menu on the Backup screen. That was one more way for you to learn how to backup computer Windows 10.
Section 3. Create a System Restore Point on Windows 10
While system restore points don’t backup any files, they let you restore your computer to the last working state which could be useful in many cases. Say your computer’s not functioning properly, then you can use one of the system restore points to roll the system back on your PC.
Here’s how to create a system restore point in Windows 10:
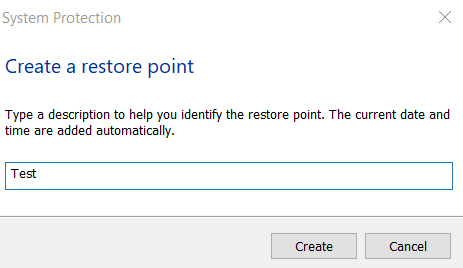
- Launch the Start Menu and search for “Create a restore point” and click on System Properties. On the following screen, in the Protection Settings section, choose the main disk drive of your PC. Then, click on the Create button to begin creating a system restore point.

- You will be asked to enter a description for the restore point. Do so and click on the Create button to continue.
Your computer will begin to create a system restore point and you will be notified when the point has been successfully created. From now on, if your computer ever becomes unstable and doesn’t work properly, you can restore your computer to the above created restore point and it will start to function normally.
Extra Tip: How to Restore A System Image Backup Of Windows 10
If the situation has arrived and you need to restore the system image backup of your Windows 10 PC, the following steps should help you do that. It’s fairly easy and you should be done in a few minutes if you follow the steps to the letter.
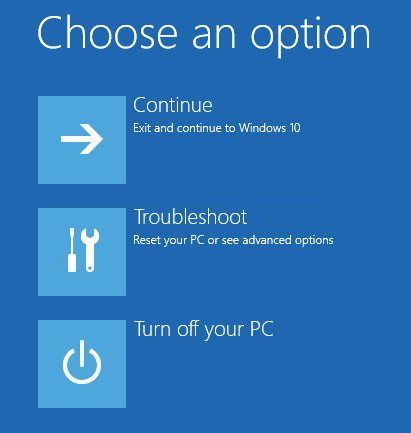
- Connect the hard disk drive you have saved the image backup on and a Windows 10 bootable CD/DVD/USB to your PC. Boot your PC from the bootable drive and select Repair your computer followed by Troubleshoot as shown below.
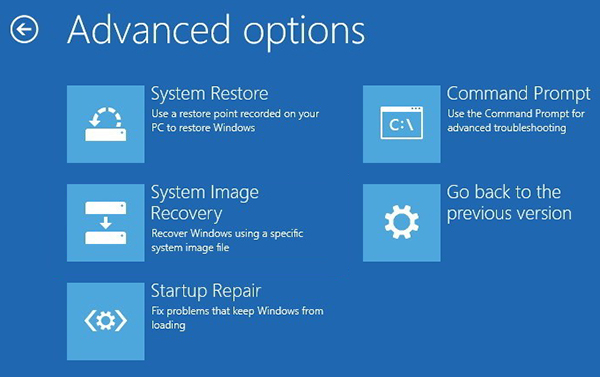
- On the following screen, select the option that says System Image Recovery.
- Choose your target operating system. It should be Windows 10 in your case.

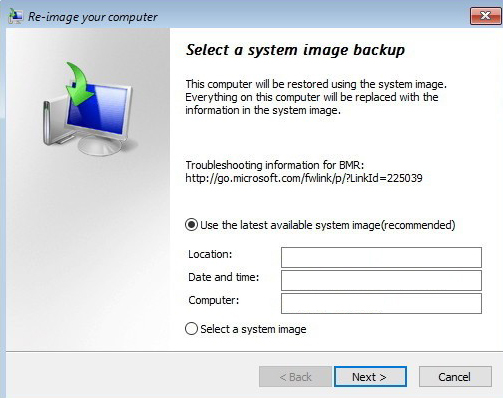
- On the following screen, choose the option that says Use the latest available system image and click on Next to continue.
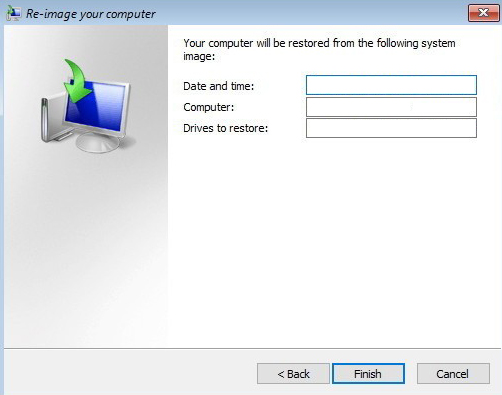
- Click on the Finish button on the following screen to begin the restoration process.
It will start restoring all the data from your system image backup to your PC. Wait for it to do that and when it’s done, you will have restored everything you had in the backup on your computer.
Data loss is an important issue and another common issue is forgetting user passwords. If you ever forget the password of your user account, you can’t log-in to your system and so can’t access any of your files. Fortunately, there’s an app called 4WinKey that helps users like you to recover the forgotten Windows 10 passwords on your computer.
While there may be several other Windows 10 backup and restore methods, the above ones are sure to help you out with your backup needs. Plus, they are extremely easy to use and are easily accessible to everyone.
- Related Articles
- How to Remove Eye Symbol from Password Field in Windows 10
- How to Fix Can’t Type Special Characters on Windows 10 Login Screen Issue
- 3 Easy Ways to Change Account Name On Windows 10 Sign-In Screen
