How to Add a Guest Account in Windows 10
How to Add a Guest Account in Windows 10
Sometimes, people may need to share their PC with someone else; a guest account comes in handy in those situations. Although Windows 10 does not come with the function of guest account nowadays, the user can always add other users to the PC as users. All the requisites for generating a guest account remains in Windows 10. Now let's move on to the answer to the big question of "how to create a guest account on Windows 10"?
Part 1: Add a Windows 10 Guest Account using Command Prompt
Part 2. Enable the Built-in Guest on Windows 10
Part 3. How to Delete Guest Accounts in Windows 10
Part 1: Add a Windows 10 Guest Account using Command Prompt
Keep in mind the following steps to know how to make a guest account on Windows 10:
1. First open Start and type in "Command Prompt" and search for it.
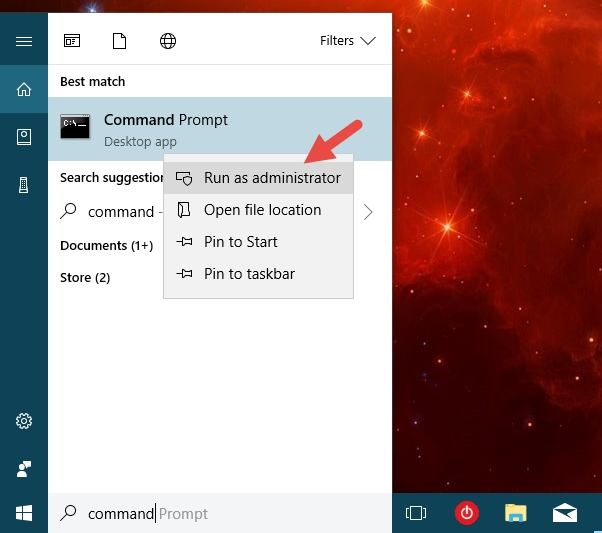
2. Make a right click on it after finding "Command Prompt" and then select "Run as administrator" from the drop-down menu.
3. Click on "Yes" on the popped up User Account dialog.
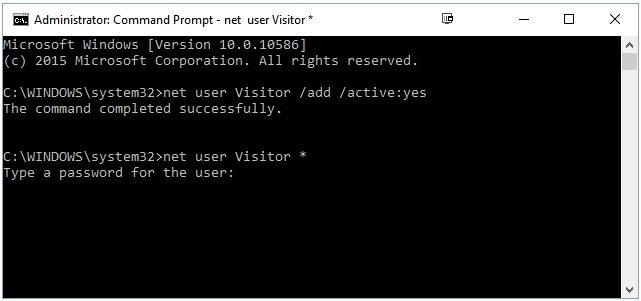
4. Choose a name for the guest account other than "Guest" cause that is reserved by Windows. For example, let's take "ABC." Type the following in the command prompt:
"net user Visitor /add /active:yes"
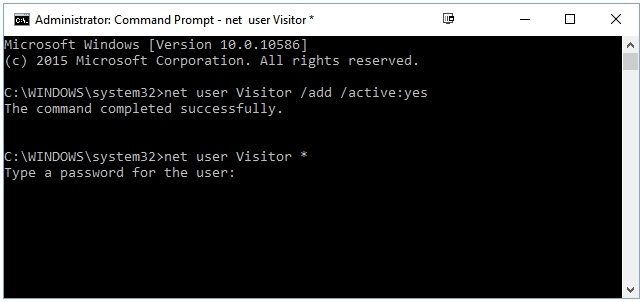
5. If the user wants to add a password to the account then he or she should type in following command:
"net user Visitor."
Otherwise, press "Enter" from the keyboard to skip the password setup.
6. The account created by this method will remain in the "Users" group. To make it deleted from the user's group and go to "Guests group" type in the following command in the prompt: "net localgroup users Visitor /delete." And press "Enter" from the keyboard.
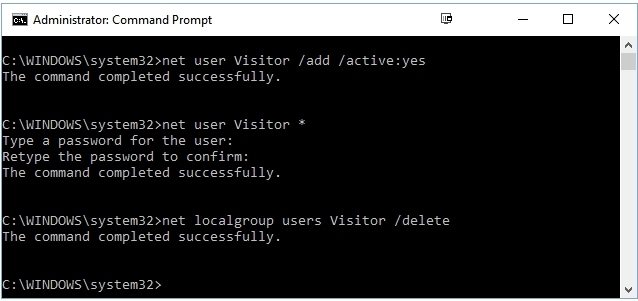
7. And then type "net localgroup guests Visitor /add." Again press "Enter" from the keyboard.
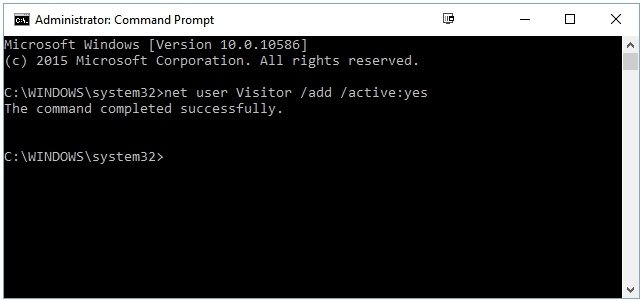
The guest account is now set up. There are other methods for setting up a guest account that are mentioned below.
Part 2. Enable the Built-in Guest on Windows 10
This method talks about how to enable guest account Windows 10 by in-built feature. 2 such ways are:
Method 1: Enable the Guest account by turning it on
1. Click on "Start" button.
2. Type in "guest" and search.
3. Click on the "Turn guest account on or off" from the search results.
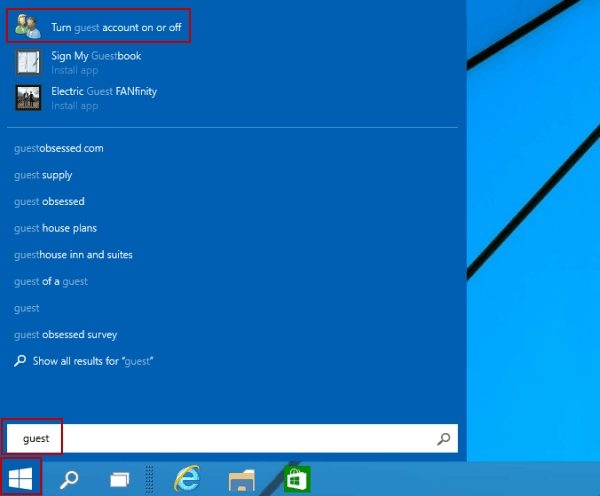
4. A window will open up named "Manage Accounts." Click on "Guest" from the options there.
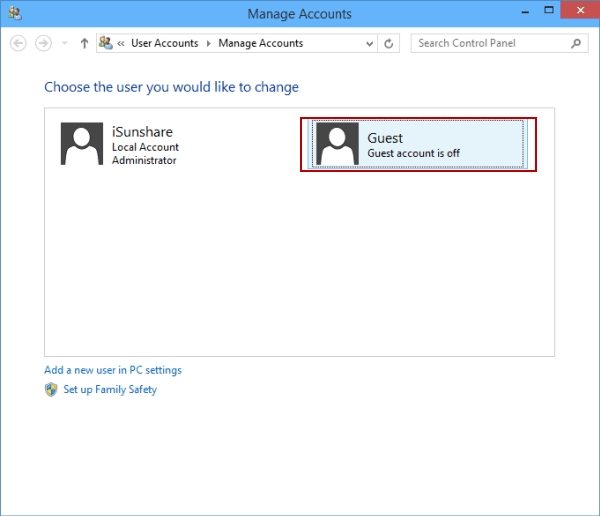
5. A question will be asked to confirm if the user wants to turn the guest on or not. Click on "Turn on".
Method 2: Enable the Guest account from computer management
1. Press "R" from the keyboard along with the Windows button for opening "Run."
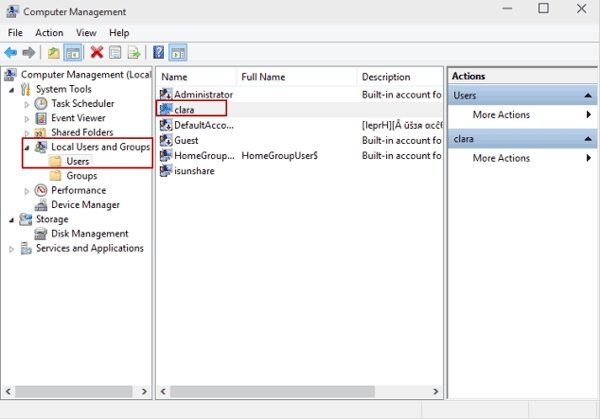
2. In the text field type in "compmgmt.msc" and then click on "OK" or press Enter from the keyboard. This will launch the computer management program.
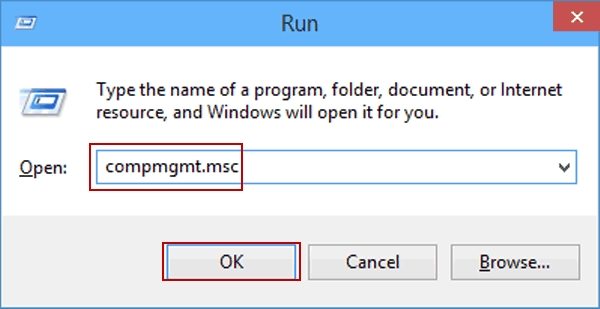
3. Locate "Guest" on the right side panel of the window. It should be in the "Users" folder under "Local Users and Groups."
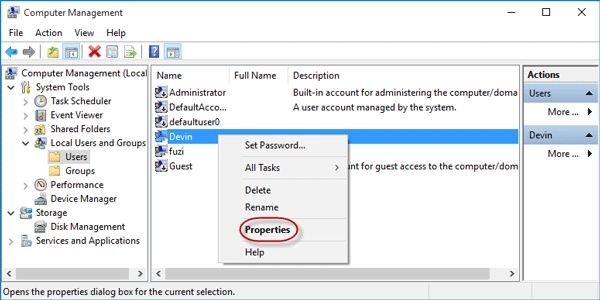
4. Make a right click on it and click on "Properties" from the drop-down menu options.
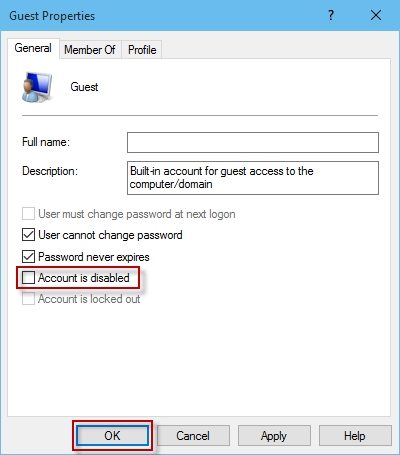
5. A window will pop up named as "Guest Properties."
6. In the window locate "Account is disabled" option box and deselect the same for enabling the guest account on the PC.
By following any of these two methods, the user can enable guest account Windows 10 via in-built operations.
Part 3. How to Delete Guest Accounts in Windows 10
When the purpose is fulfilled deleting the guest account is a good practice to perform. Sometimes it is necessary for security and privacy issues too. To remove the guest account, the user should be logged into the "Administrator" account. After logging in to the "Administrator" account follow these simple steps to delete the guest account
1. Click on "Start" and search for "Settings."
2. Click on "Settings" to launch it.
3. In "settings" window go to "Accounts."
4. Locate "Family & other people" on the left side menu of the window and click on it.
5. Look for the guest accounts created on the PC under "Other People."
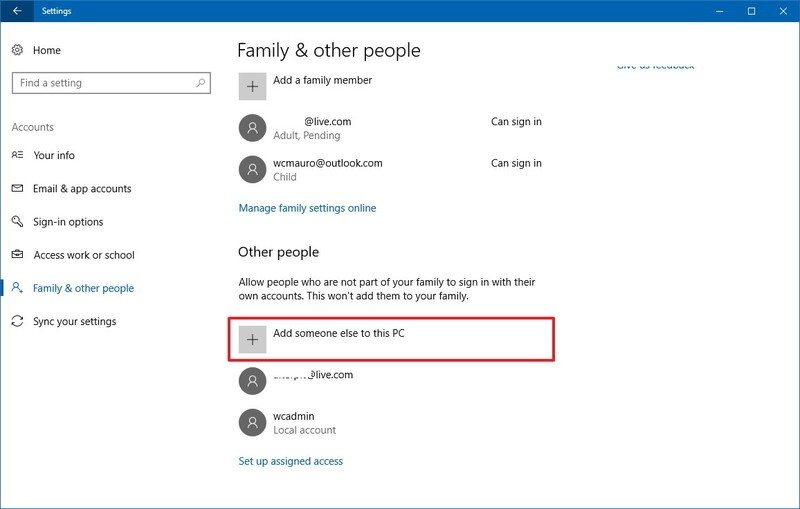
6. Click on the accounts to be deleted and choose the option "Remove."
By following this method the guest account and all of its data should be completely wiped out from the PC.
The idea of having one or more guest account is sometimes concerned with security issues. But having one is not that bad. Think of it as giving out limited amount access to people close to you who can help him or her by accessing the PC when the user is not around the PC. Guest account saves all the settings of the user, and hence, customizations are saved. The ways mentioned above can be used to enable guest accounts. The article also tells about how to remove a guest account too. So, if the user feels any time that the guest account is not required, he or she can easily remove it by using the removal method mentioned above.
Other than adding and removing guest accounts in the PC, people may face other problems such as forgetting the password, which is extremely inconvenient. However, with the use of a simple tool named 4WinKeyone can retrieve the password of WINDOWS 10 PC.
- Reset/Remove Windows admin and other user password for local/domain account.
- Create a new local/domain admin account to unlock your computer.
- Change your Microsoft account password offline.
- Fully support Windows 10/8.1/8/7/Vista/XP, Windows Server 2012 (R2)/2008 (R2)/2003 (R2).
- Related Articles
- 2 Ways to Change Account Type of Users in Windows 10
- Windows 10 Keeps Asking for Login User Password, How to Fix It
- Windows 10 Password is Incorrect, How to Fix it
